Funeral Flower arrangement: Flowers for Mom
May 3, 2019
Bridal Bouquets: To have and to hold
April 10, 2020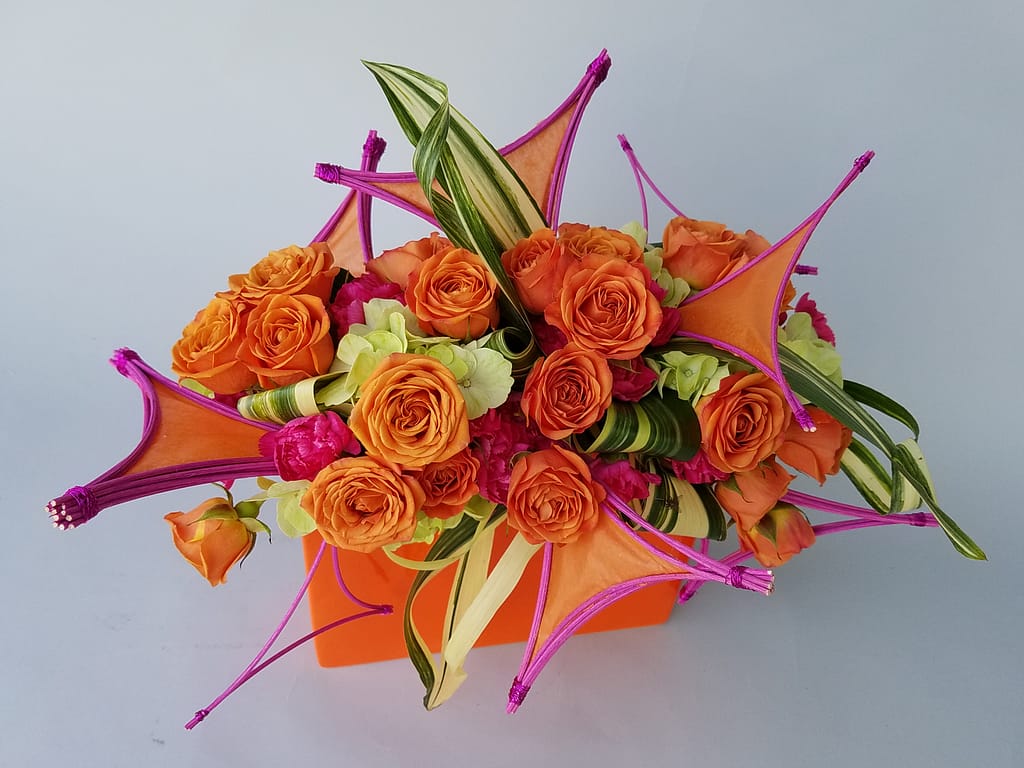
Floral Arrangement
Bold summer colours are always a win for designers specially when trying angular floral arrangements for best flower design result . They remind customers of days on the beach or holidays by the ocean in countries that do not hold back with a full palette and patterns. All one has to do is imagine a Hawaiian shirt or Mexican blanket, and he or she is taken to the world of bold colour.
But what is the science behind these works of warm freshness? The formula consists of a mixture of equal amounts of primary and secondary colours, which we call tertiary. On the colour wheel, the primary and secondary colours can be found next to one another.
A designer can pile gorgeous bold coloured flowers into a vase and make a customer happy with the flower Design that they make. However, how about we push the envelope with some foliage manipulation and a technique that gives the appearance of a hip stain glass? Making new Angles for flower arrangements one step further with materials (ones that we already have stocked in the shop) creates not only interest but also increases the perceived value of the arrangement.
Flower Arranging Tips
I absolutely fell in love with this orange Accent Décor container that almost jumped off of the shelf at me. Using the container as inspiration to play and have fun, I knew I would need to use tertiary colours, but I also wanted to take it two notches above the norm.
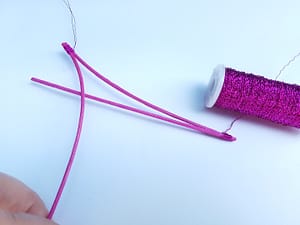
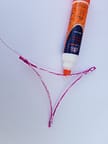
I grabbed a stack of midollino in hot pink, a hot pink bouillon roll, and some orange tissue paper. I started by cutting five midollino sticks in five-inch increments.
Taking two of the 5” sticks, I bound them together at the top with the pink bouillon in a nice clean pattern only about 3-4mm wide, after which I twisted the start and finish ends together and hid the raw end.
Next I took one unbound end and added another 5” stick and bound (repeat previous step). The remaining two loose ends were bound while leaving a nice sized tail of bouillon, and you should have a triangle with concave edges.
Next, I grabbed Elmer’s Glue. Time to craft, kiddos! All inner childs on deck, please! I placed a very small line of glue around the entire triangle on one side.
I carefully placed the triangle on the tissue paper (glue side down) and ensured that there were no wrinkles and that the tissue was pulled tight.
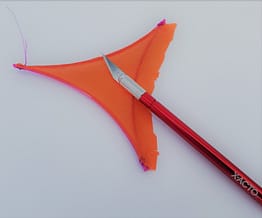
After the glue dried, I cut the tissue paper away with an Exacto knife, leaving clean lines and smooth edges. I had one gorgeous triangle, which I wired to a wooden pick. Create 5-7 of these or more if that is what your inner child wishes
Next, I focused on foliage manipulation. I found the mini version of variegated aspidistra and had a blast with these little cuties. For the first version, I did a partial knot.
I held the leaf with my thumb and pointer finger at the junction where the steam and leaf meat, making sure the front was facing me.
Then I grabbed the tail and wrapped around the front in order to create a funnel shape. The last step was to fold and then staple the tail inside the funnel.
Another fun foliage manipulation I loved was playing with the aspidistra leaves. I took sharp scissors and nipped at the spine at the back of the leaf, about 1.5 inches up from the junctions where the stem meets the leaf.
I pushed from the front and very gently pulled up the inner leaf to the outer tip until the natural lines naturally tore apart. I stopped pulling about 1 cm from the end. I played with twisting, turning and looping until I find a natural curve that the new leaf would sit in.
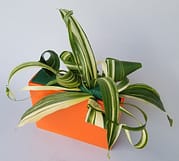
When I insert it into the foam, I recut the stem and made sure both ends had a water source. I created a pattern of insertions that were inspired by a gift-wrapped package. Do you need to use as many insertions as I did? Absolutely not. I was just covering my foam and so excited to use all of the mini aspidistras.

My bold arrangement was created using a layering technique. I started with a large, green hydrangea head, which was split into five bracts, and inserted it methodically to cover as much space as possible. I inserted mini hot pink carnations in clusters of three just a bit lower than the hydrangea. All of this can highlight the flower design.
This ensured that they were not the man focus but still gave a pop of contrast colors so beautifully. For the last layer, I used babe orange spray roses to complete the tertiary colour palette and to add that perfect amount of soft texture.
These I also inserted in groups of three to create more impact. If you look closely, they are hovering slightly above the hydrangea and carnations.
And now it was finally time by inserting the stained glass looking triangles on picks. They expanded the space and broke up the traditional round fluff thanks to their sharp lines with some serious sexy curves and coordinating colours.
So what are you waiting for? Tertiary colours? Check. Inner child? Check. Sexy triangles? Check. Ladies and gentlemen, now it is your turn to play, and I cannot wait to see your flower design creation.